
A little while ago, a dear pal – let’s call her Fiona (well that’s her name, it seems only right to use it), expressed an interest in tackling some DIY malarkey. She had spotted a copper pipe ladder on one of her Pinterest journeys and wanted to create something similar. As soon as the word ‘copper’ was whispered, I was in. This is our DIY journey…
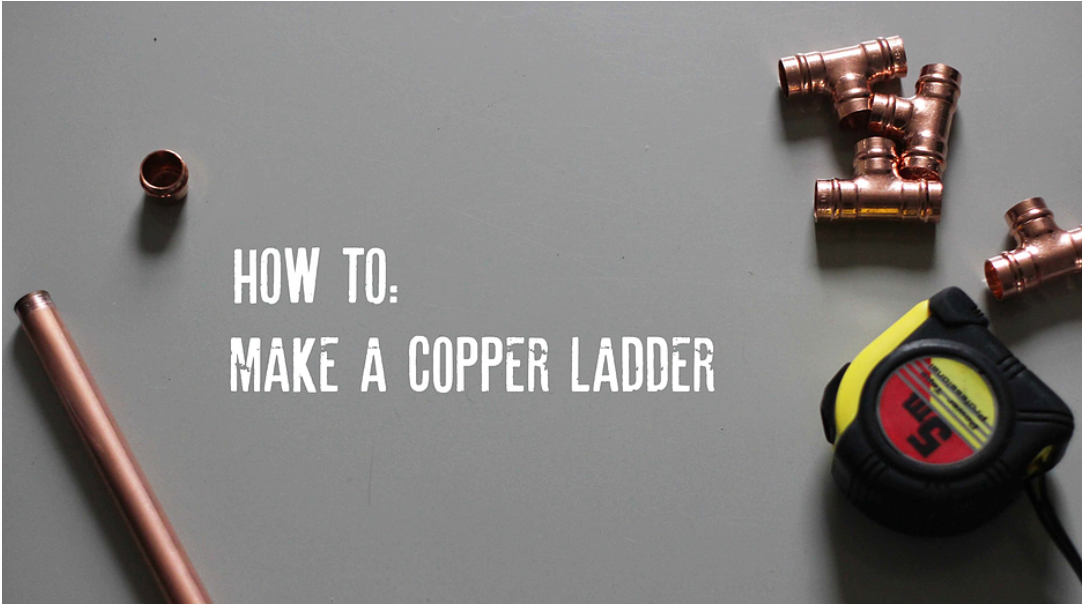
How to make a copper pipe ladder
You’ll need:
- 4 x 1/2″ copper caps
- 10 x 1/2″ copper tee (looks like a Capital T)
- Pipe cutter
- Black Marker
- Measuring Tape
- Glue
- Two 1/2″ diameter 9ft copper plumbers pipe
Cut List for above pipes:
- Rungs: 5 x 12″
- Top & Bottom: 4 x 14″ length copper pipe
- Mid section: 8 x 10″
Music to work to: Copper Mines by Mothers
Awesome Femme we are channelling: Today we’ll be channeling my favourite TV ‘copper’ Catherine Cawood of Happy Valley. WHAT A WOMAN. Not sure she’d have to time or the inclination for an activity such as this, but let me tell you – if she did, she’d have it completed within the hour.
First thing to do is get all your supplies – your local hardware store will have everything you need. We shopped at Grange Builders in Baldoyle and they were ridiculously nice and helpful, even cutting down our pipe for us – who knew my tiny Polo wouldn’t have the space for a 9ft length of piping! Would highly recommend them if you are without a local hardware store.

After this, start cutting down your copper pipe. Measure with the tape, mark it and cut. EASY. It will inevitably take longer than you think – Fiona and I turned it into a competition. Safe to say, she won.


Only delighted with her pipe-cutting win.
Once you have all your pipe cut – lay it out in groups with the copper tees and caps, all the 14” together, all the 10” together etc – it will make the construction of the ladder all the easier.


Then comes the fun part – attaching it all together. Start with the bottom section and work your way up, I would suggest using glue (Super works great) to reinforce the joints. Yes this ladder isn’t meant for standing on (please DO NOT STAND ON IT) but the glue will make it sturdier.


Once you have all the pieces attached – stand the ladder up and make sure the sides are even. If they are not, you might need to hammer one side down more, or push a cap more snuggly onto the copper pipe. Then lie the ladder down on a flat surface so the glue can dry.
And that’s it. Copper ladder complete! You are officially a DIY genius. Prop your ladder against a wall, throw a towel over it and glow with pride at your intensely good handiwork.


Ta Dah!
We’d LOVE to see your creations — send us a snap on our email at hello@aprilandthebear.com and we’ll tell you how awesome it looks!
NOTE: This is how to make a decorative ladder only — not a ladder for climbing.
No Comments